We Be Jammin’
Making and canning my own jams and other goods in the summertime was always something I interested in learning, but to be honest I didn’t know where to start. It seemed so intimidating to try on my own, and it actually can be the first time that you do it. Luckily, my grad school program offered some really unique, fun classes and one of them happened to be a Canning 101 summer class. I cannot tell you how excited I was to get the chance to take this class; to learn this technique in a fun environment with a bunch of my friends from a trusted professor? The best. I will say that if you have never tried canning, see if you can find a friend or family member that can show you the ropes for your first time. It’s something you certainly can do on your own, but I think that having someone else who is familiar with the process just takes the nervousness-factor down a bit.
To get started, I used the website for the University of Georgia’s National Center for Home Food Preservation as a “textbook”, which in my opinion is the best resource I have come across. This site is well-loved and trusted for good reason: it is written with all sorts of guides for different types of canning, as well as some great simple recipes to get started with. As dietitians, we learn enough about food-borne illness in school to be ultra-aware of food safety in all aspects of cooking. I will just say that there are a lot of philosophies and ideas out there about canning, but this website is definitely the best resource to ensure you learn the technique in the most food-safe manner. You may have to take some of the other things you see and hear with a bit of a grain of salt and make sure that you turn to a trusted, tested source to get the basics down.
Another great resource is the Ball canning website:
So, with all of that said, here is my process for making Strawberry jam! It is a bit-time consuming but really not hard at all. Once you have the canning materials, you only need 3 ingredients to make the actual jam. I have started making this during the summertime when strawberries are perfectly ripe and in season, then give it away as gifts throughout the year. Who doesn’t LOVE homemade jam? It is the perfect thoughtful, handmade gift, and averaging about $2 a jar, it’s pretty reasonably priced too!
The particular recipe that I used this time around is the NCHFP’s Strawberry Jam with Powdered Pectin. The basic method is summarized as follows:
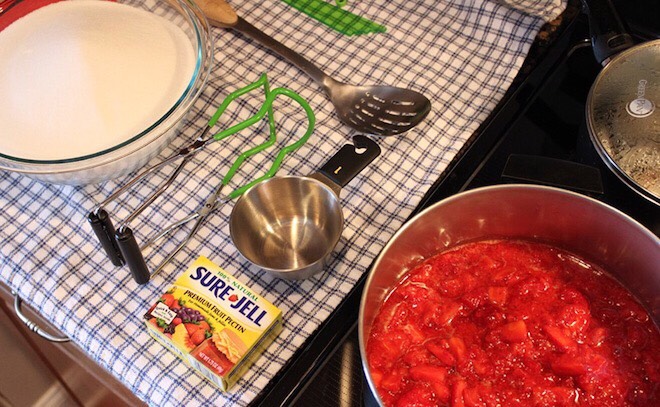
- Wash all jars, lids and screws in warm, soapy water and rinse. Then, put the jars in the canning pot, cover with water and bring to a rolling boil. Put the lids and screws in a small pot, cover with water and also bring to a rolling boil. Boil the jars and lids for at least 10 minutes to sterilize.
- Meanwhile, wash and slice all of your strawberries.
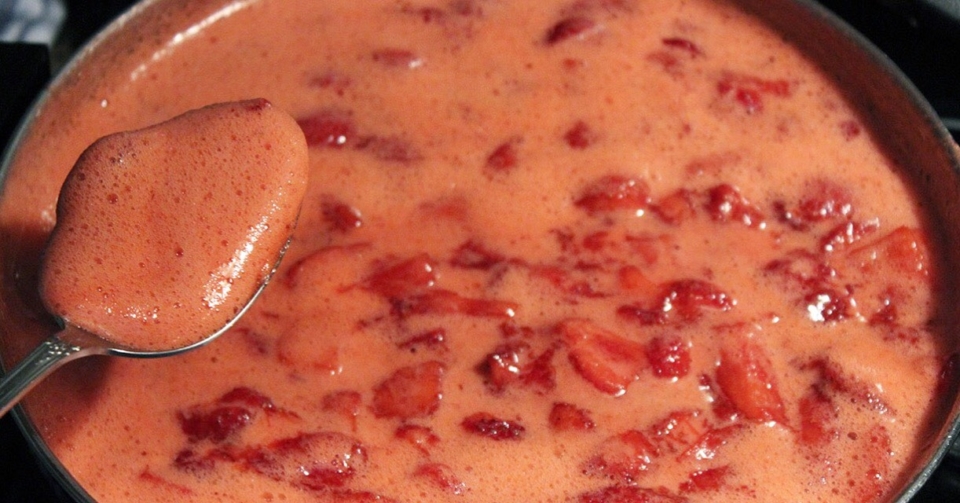
- Put the strawberries into a large pot and crush them until they are fairly well macerated and the juices have released.
- [NCHFP] Measure crushed strawberries into a kettle. Add pectin and stir well. Place on high heat and, stirring constantly, bring quickly to a full boil with bubbles over the entire surface. Add sugar, continue stirring, and heat again to a full bubbling boil. Boil hard for 1 minute, stirring constantly. Remove from heat; skim.
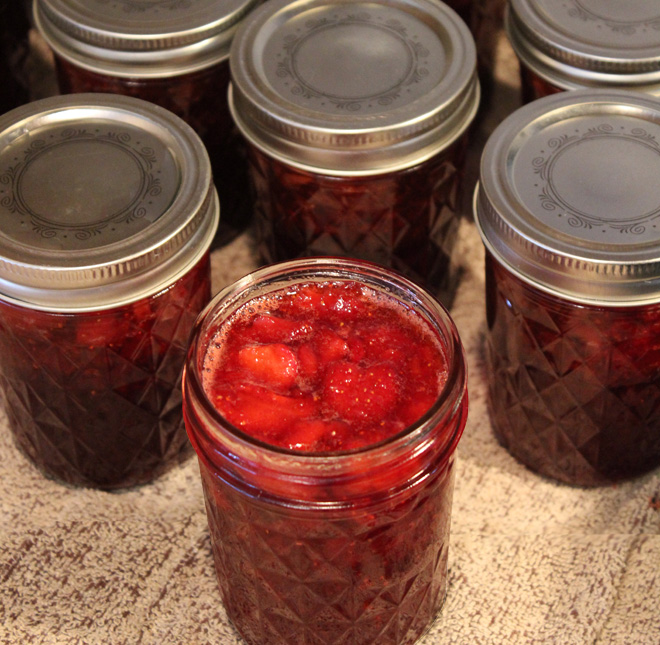
Once the jam is cooked and you have skimmed the surface, remove jars from the boiling water in the canning pot. - [NCHFP] Fill hot jam immediately into hot, sterile jars, leaving ¼ inch headspace. Wipe rims of jars with a dampened clean paper towel; adjust two-piece metal canning lids. Process in a Boiling Water Canner.
- Replace all of the filled jars into the canning pot and bring the water back to a boil. “Process” (or let the jars sit in the boiling water) for 5 minutes, or adjust as needed for your altitude level.
- Carefully, using your jar lifters, remove the jars from the canning pot. Place them on a towel on your counter and let sit still for 24 hours. If you hear popping sounds that’s good sign- your jars are sealing properly!